Program Management
Build and manage your conference program
The Program Builder allows you to create a structured schedule for your conference with days, sessions, and program items.
Program Workflow
- Add Days: Create conference dates
- Add Sessions: Create time blocks for each day
- Add Items: Fill sessions with program content
- Add Description (optional): Provide context about your program
- Publish: Make the program visible to attendees
- Enable AI Chat (optional): Allow attendees to ask questions about your program
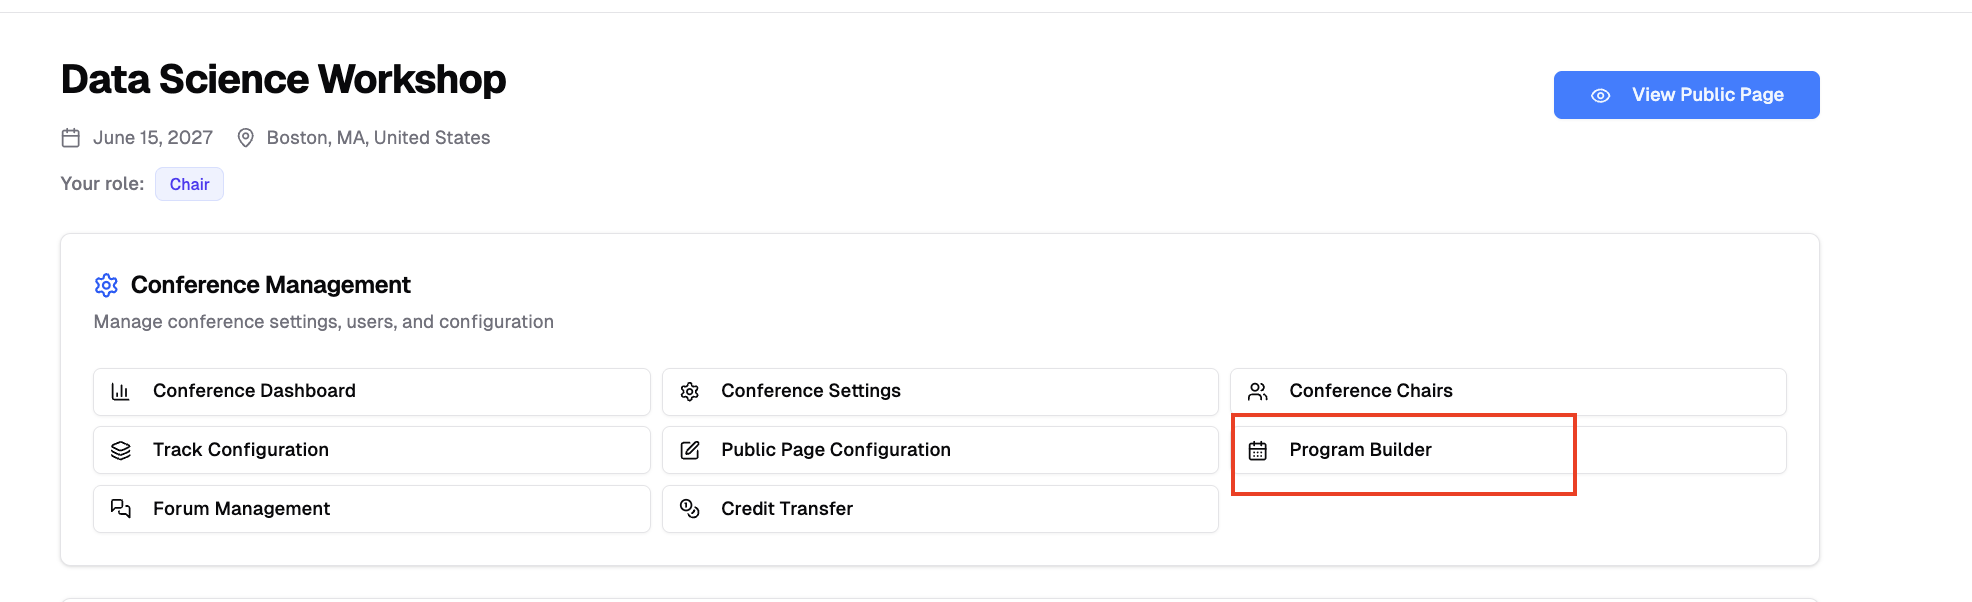
Accessing Program Builder
- Navigate to your conference dashboard
- Click "Program Builder"
The program is automatically created when you first access Program Builder.
Program Structure
Your conference program is organized hierarchically:
- Program: The overall conference schedule
- Days: Individual dates of your conference
- Sessions: Time blocks within each day (e.g., "Morning Session", "Keynote", "Coffee Break")
- Items: Individual activities within sessions (e.g., papers, talks, panels)
Program Description
Add an optional description in the Program Settings section:
- Click the description editor
- Write content using the rich text editor
- Click "Save"
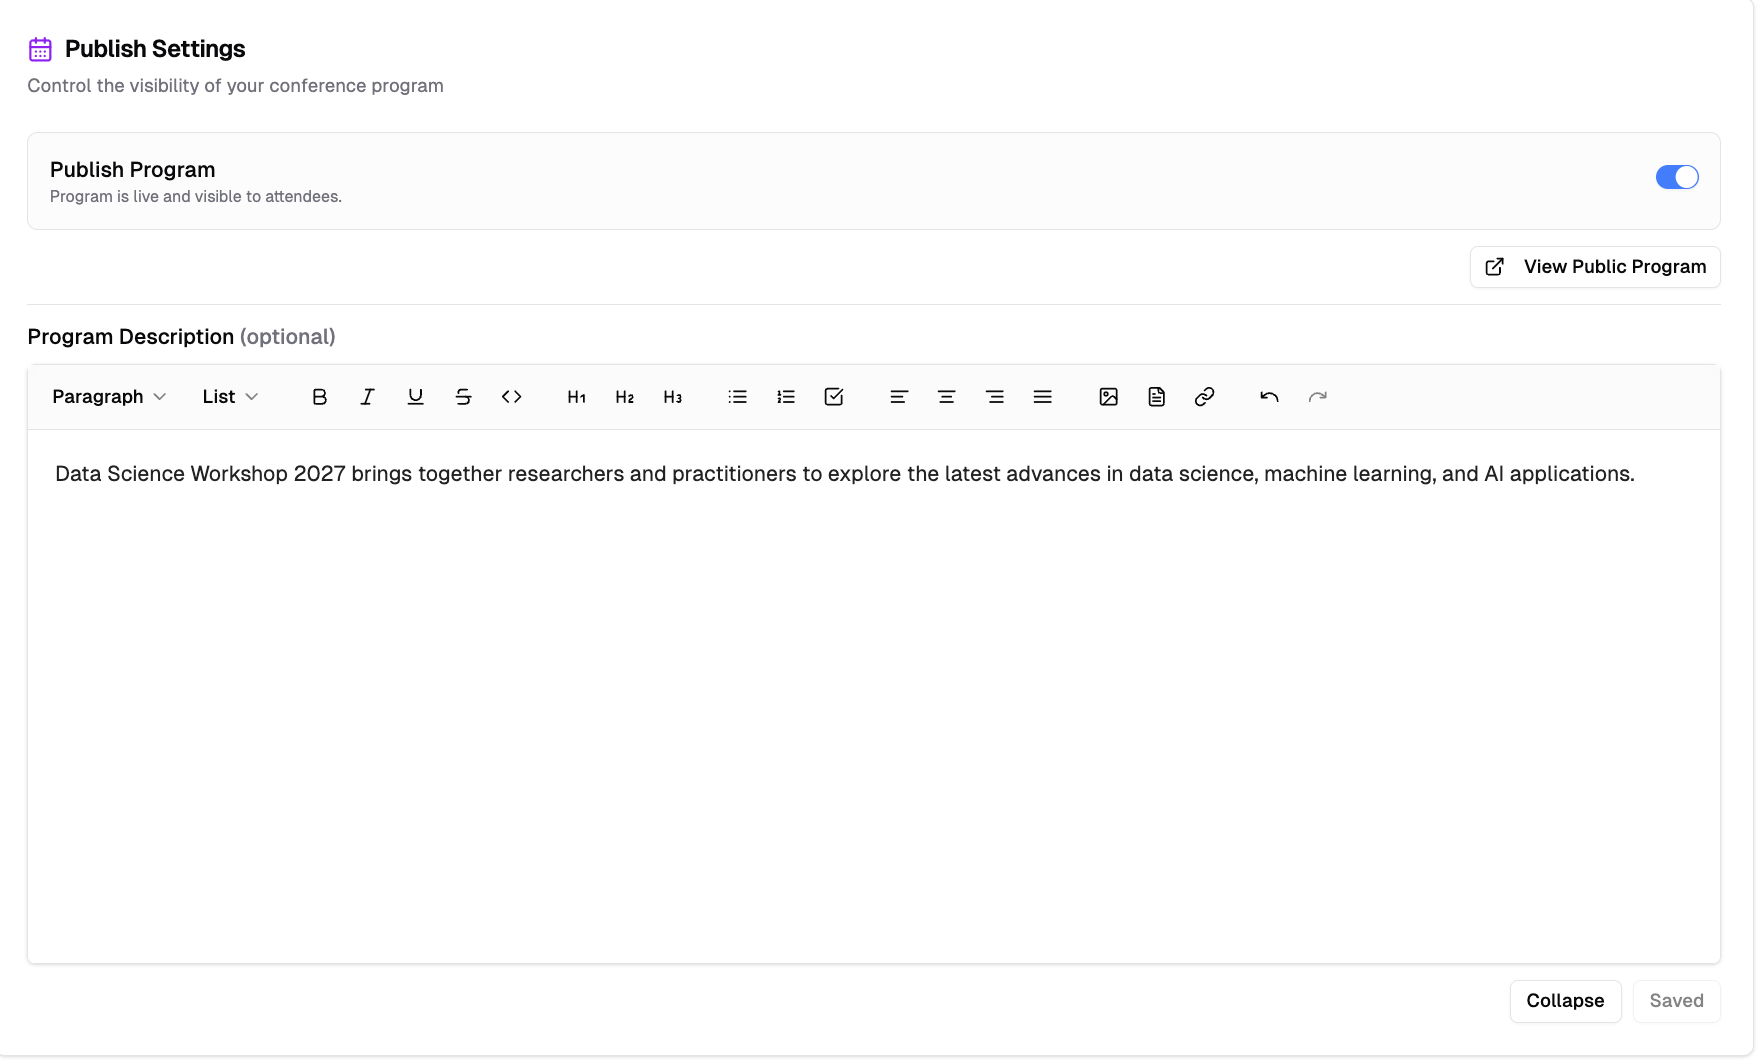
The description supports text formatting, images, links, and file attachments.
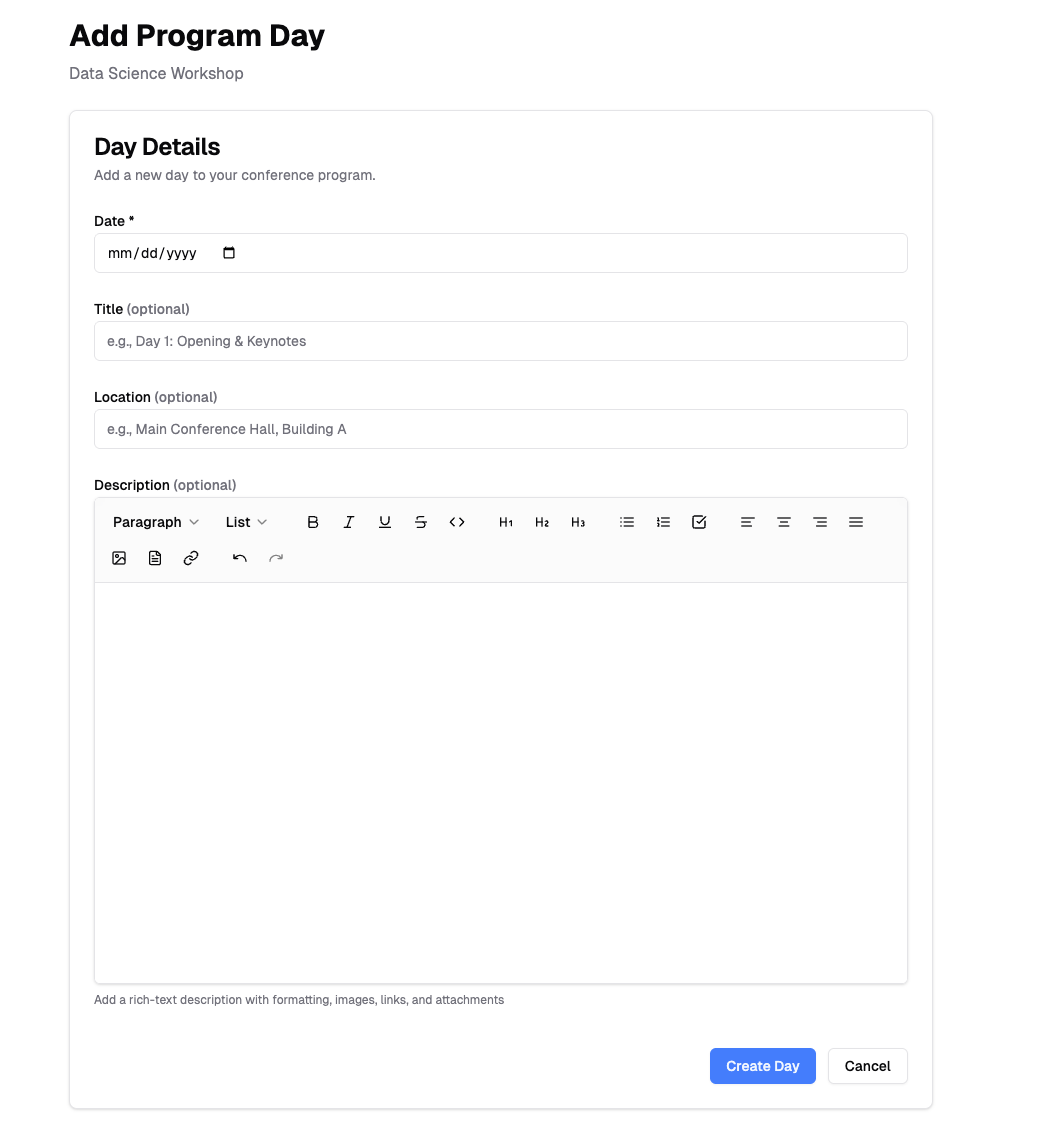
Managing Program Days
Add a Day
- Click "Add Day" button
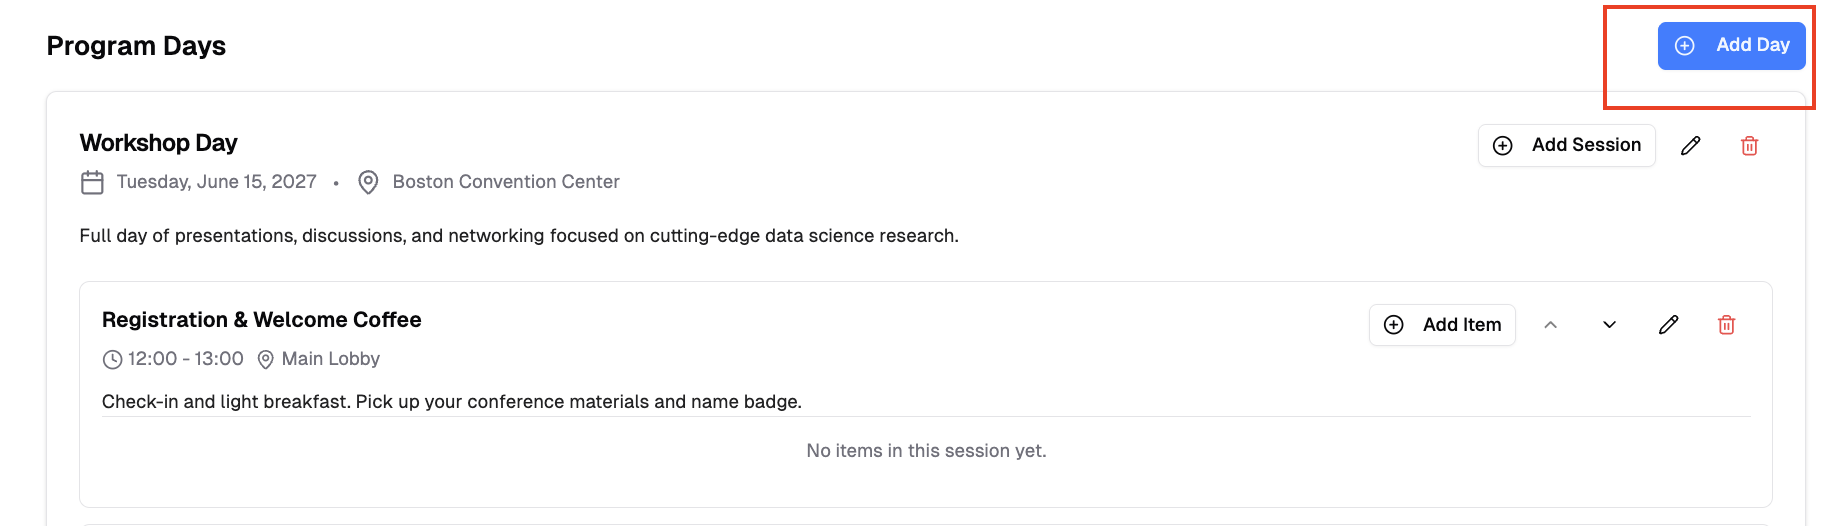
- Fill in day details:
- Date (required): Select the conference date
- Title (optional): e.g., "Day 1: Opening & Keynotes"
- Location (optional): e.g., "Main Conference Hall"
- Description (optional): Rich text description with image and crop to avatar support
- Click "Create Day"
To edit or delete a day, click the edit or delete icon. Note that deleting a day removes all its sessions and items.
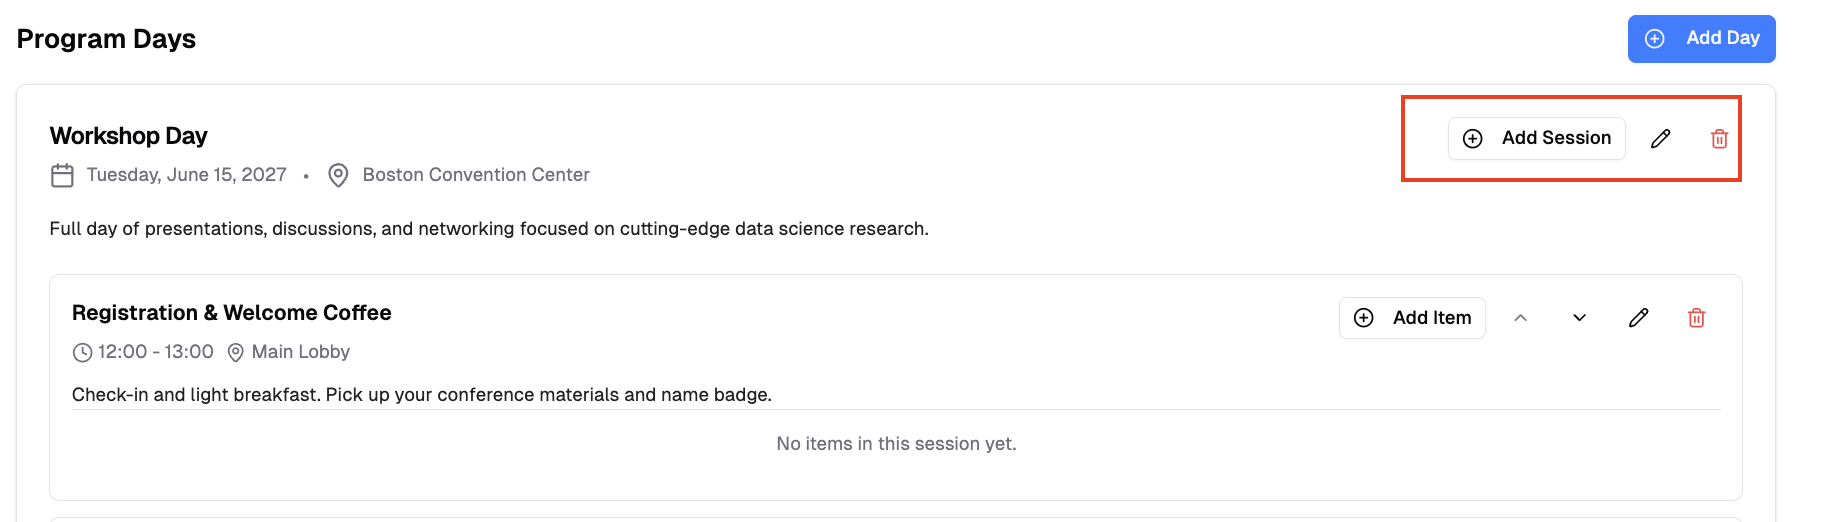
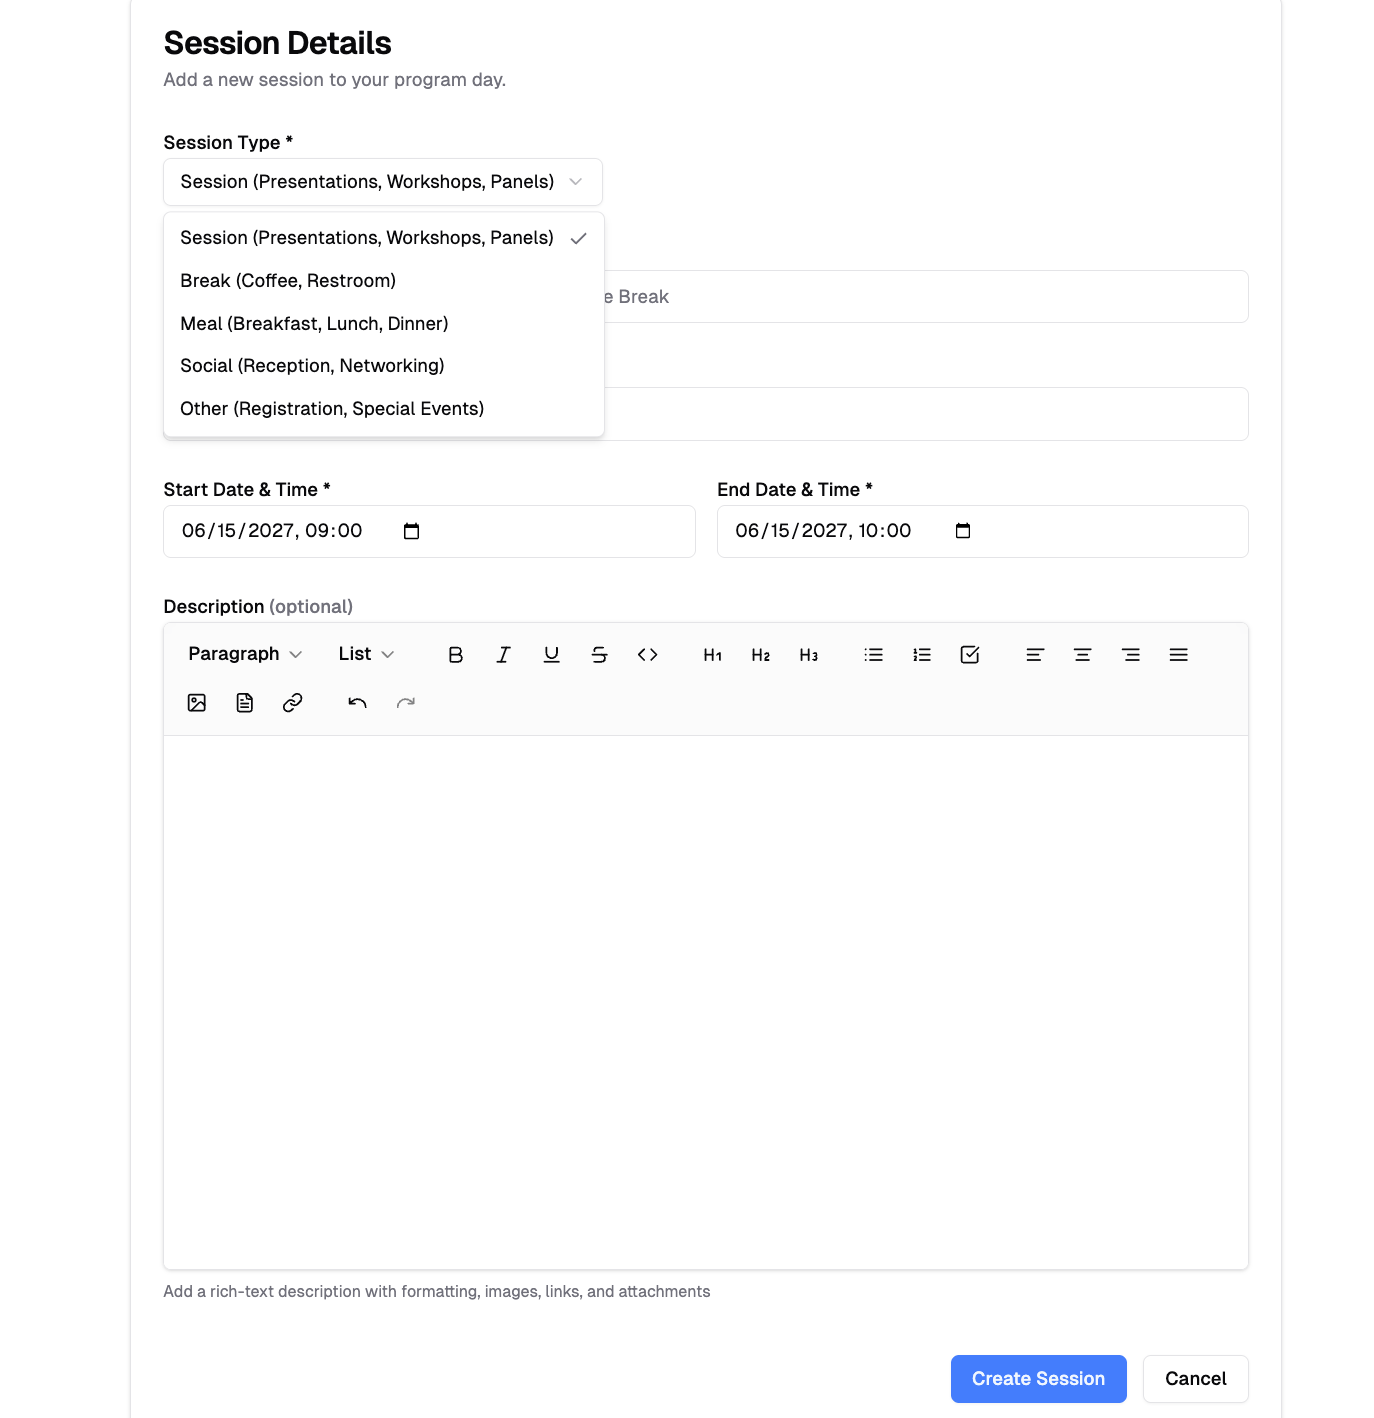
Managing Sessions
Add a Session
- Click "Add Session" on a program day
- Fill in session details:
- Session Type (required): Choose from SESSION, BREAK, MEAL, SOCIAL, or OTHER
- Title (required): e.g., "Session 1A: Machine Learning"
- Location (optional): e.g., "Room 101"
- Start Time (required): Session start date and time
- End Time (required): Session end date and time
- Description (optional): Rich text description with image and crop to avatar support
- Click "Create Session"
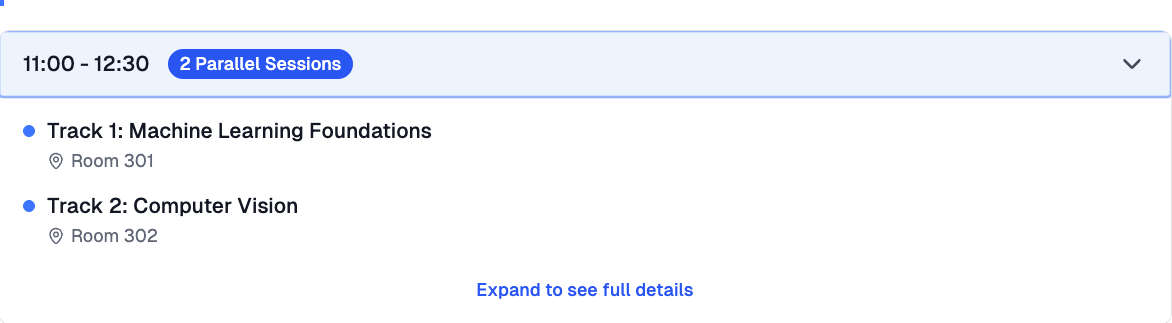
Parallel Sessions
You can schedule multiple sessions that start at the same time to accommodate parallel tracks or concurrent activities. Sessions sharing a start time are grouped under one time slot and labeled as parallel, as shown below in the Program Builder.
To edit or delete a session, click the edit or delete icon. Note that deleting a session removes all its program items.
Managing Program Items
Add an Item
- Click "Add Item" within a session
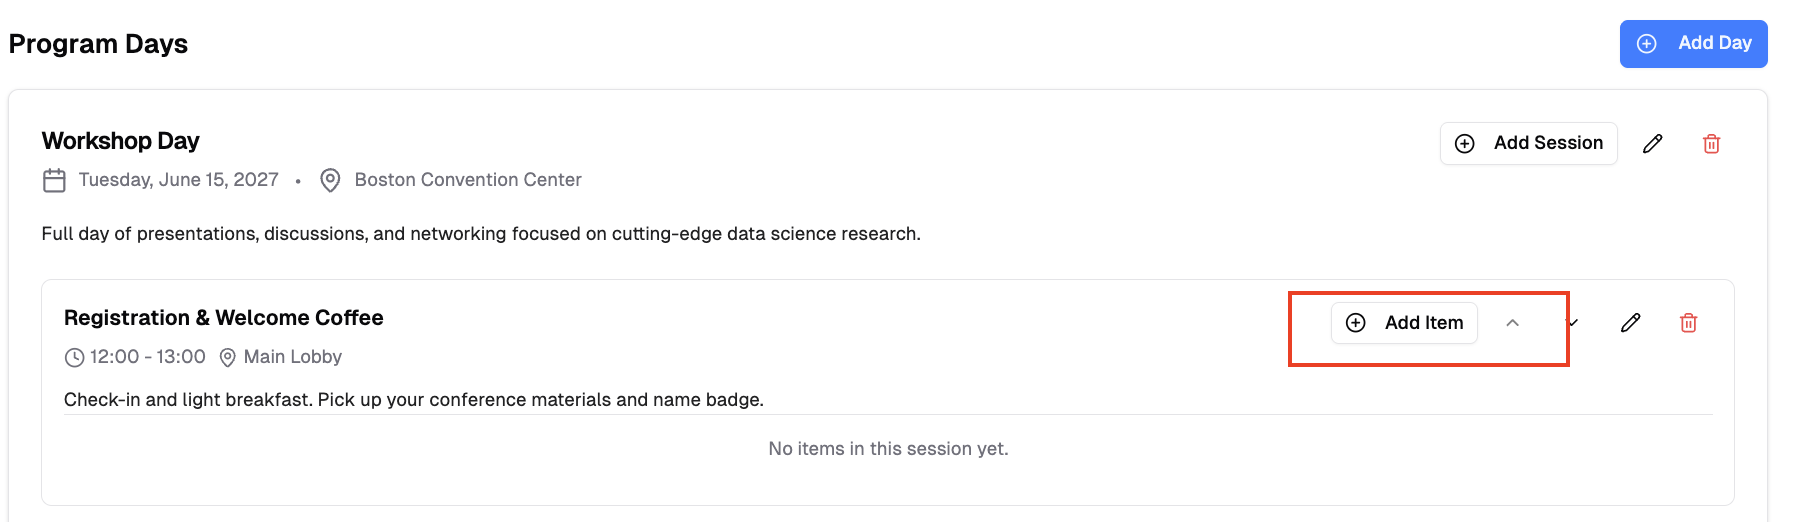
- Fill in item details:
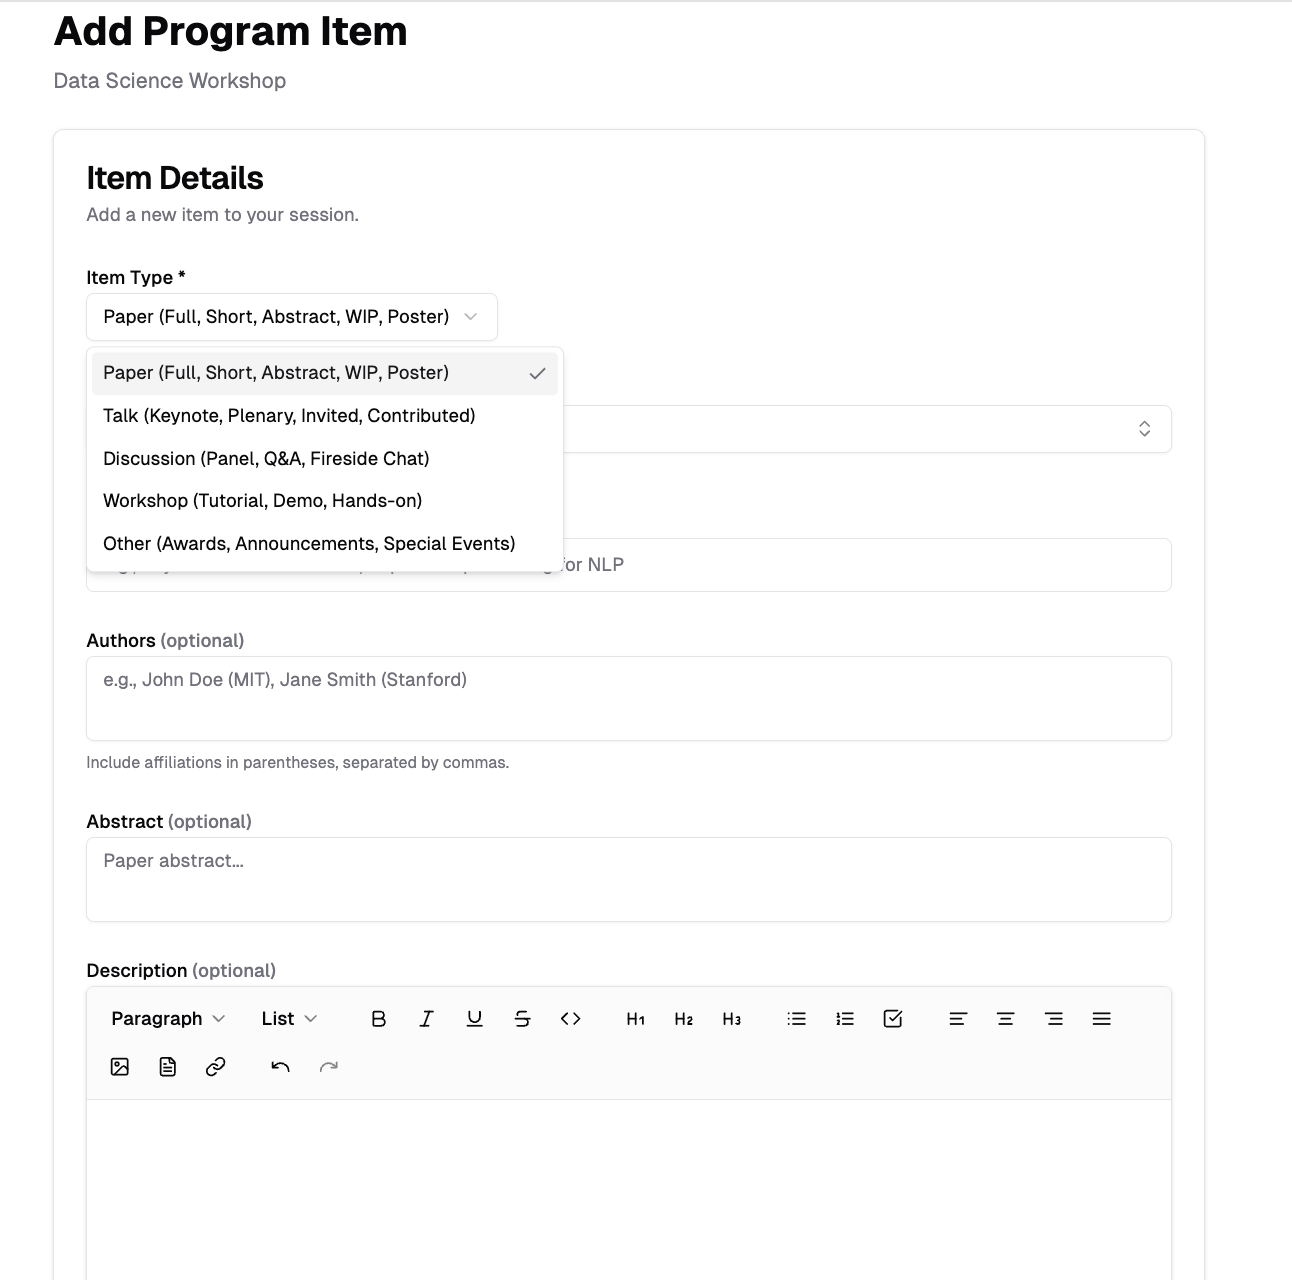
- Item Type (required): PAPER, POSTER, TALK, DISCUSSION, WORKSHOP, or OTHER
- Title (required): Item title
- Description (optional): Rich text description with image support
- Click "Create Item"
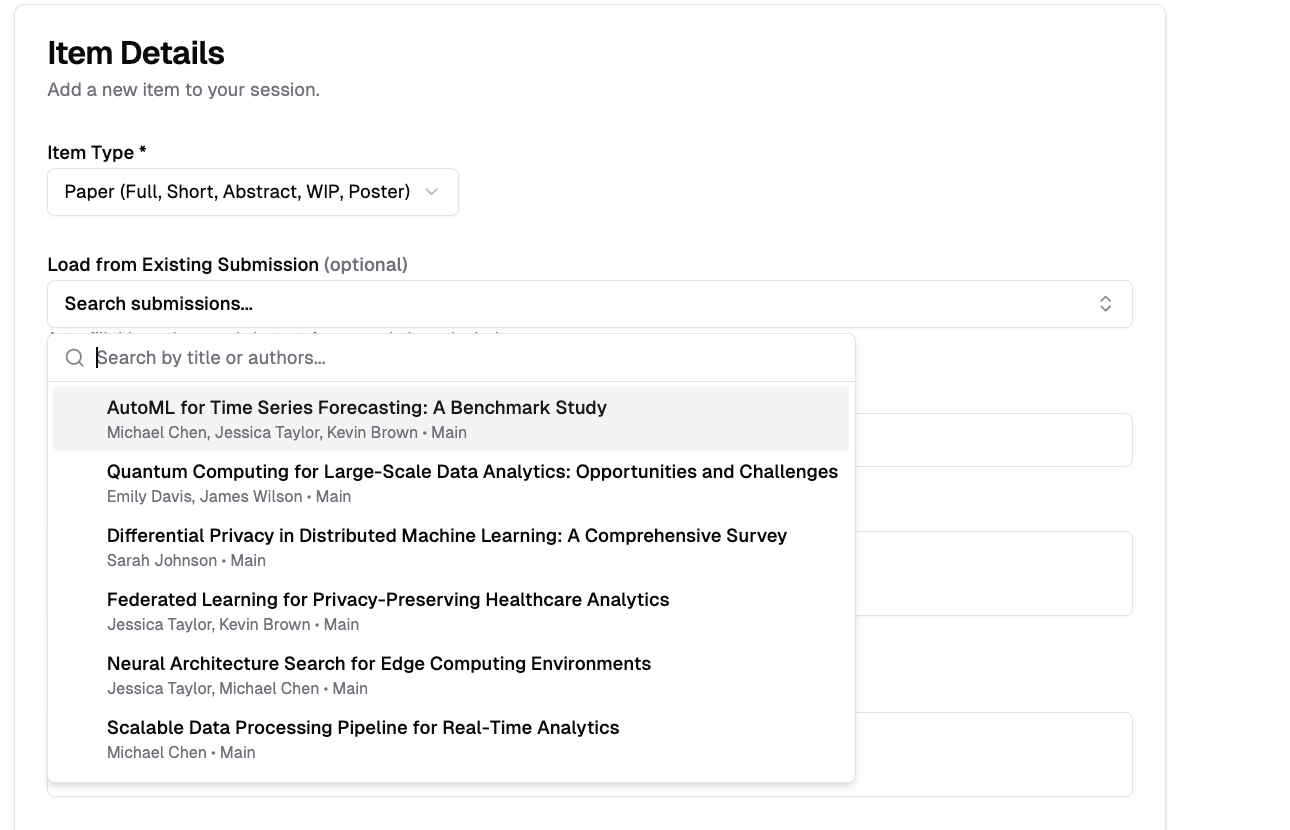
Link to Submission
For PAPER type items, you can link to an existing submission:
- Select "PAPER" as item type
- Click "Load from Existing Submission"
- Search and select a submission
- Title, authors, and abstract are automatically filled
Paper-Specific Fields
When creating a PAPER item:
- Authors (optional): List authors with affiliations
- Abstract (optional): Paper abstract
Talk-Specific Fields
When creating a TALK item:
- Presenters (optional): List presenters with affiliations
To edit or delete an item, click the edit or delete icon.
Crop to Avatar Tool
Use this feature to create professional circular profile pictures for speakers and presenters in your program descriptions.
- Click the image icon in the editor toolbar
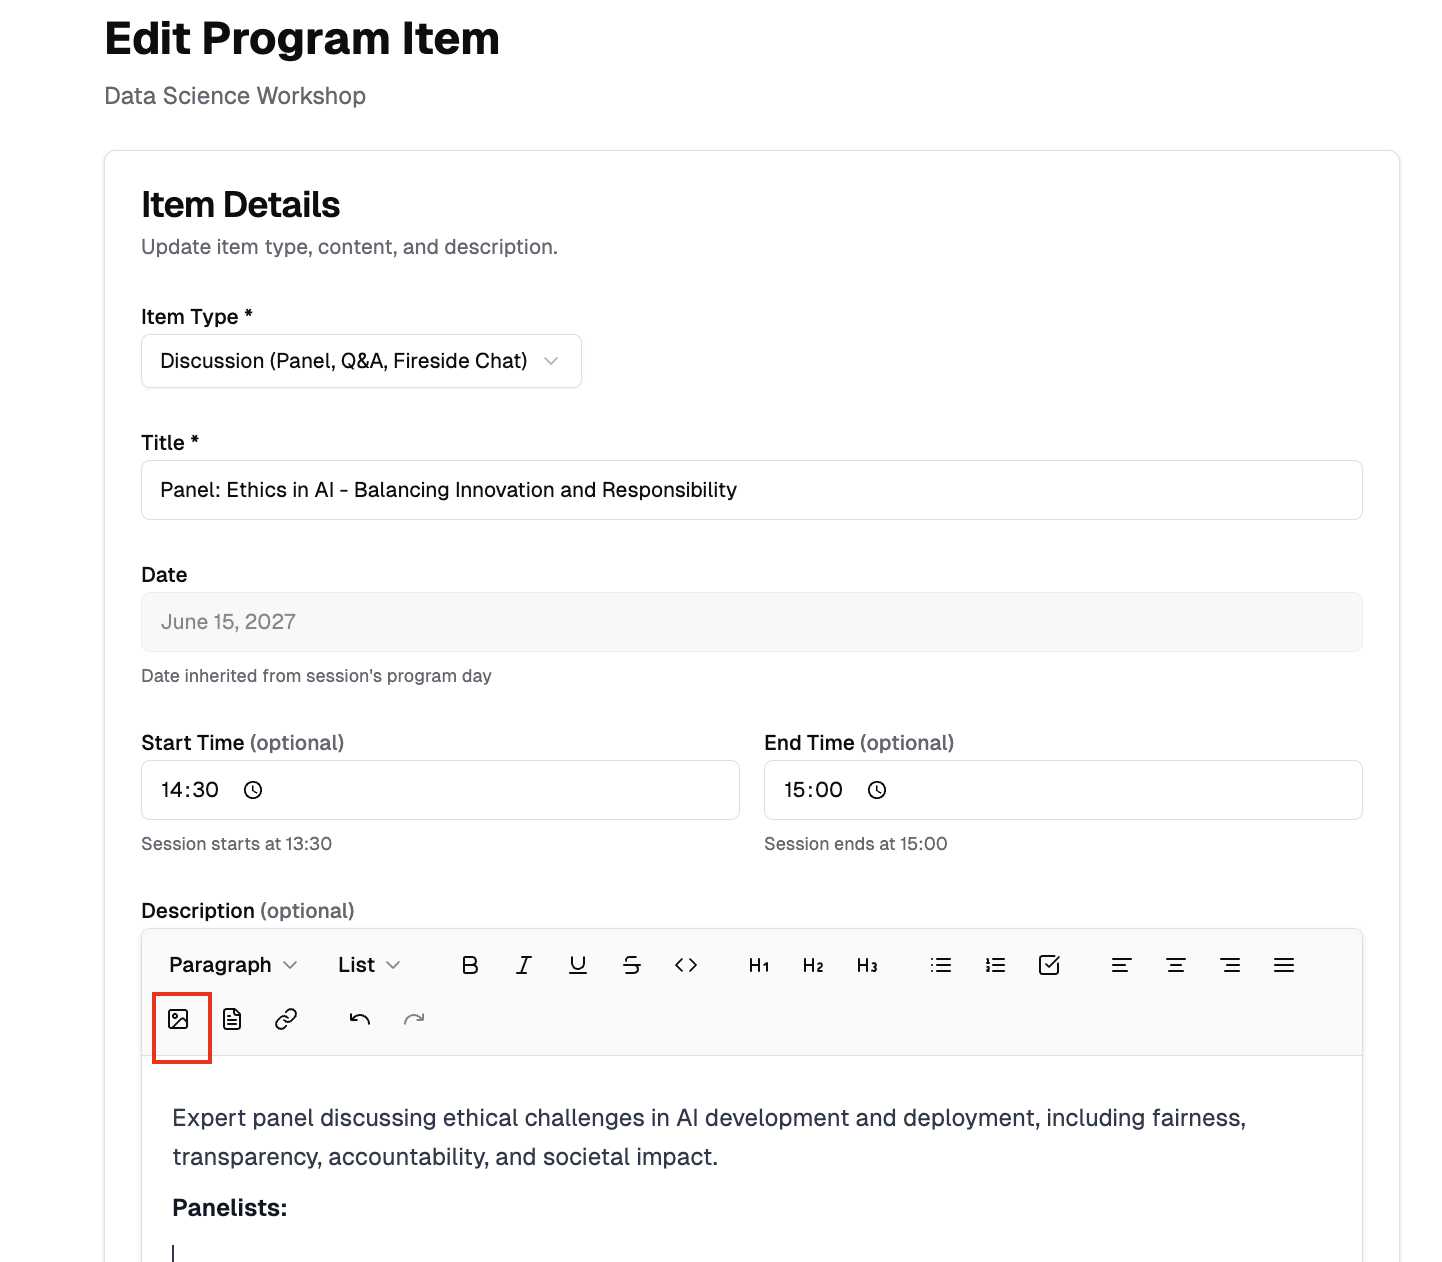
- Upload your image and click it to locate the crop tool
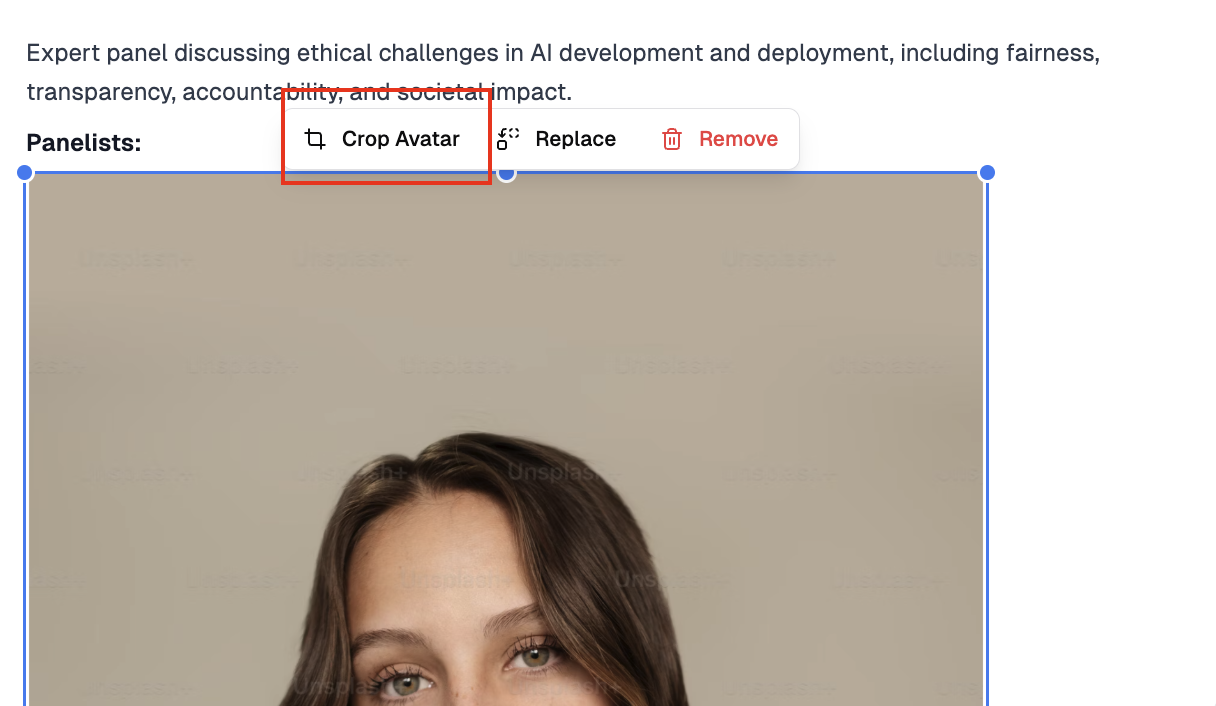
- Adjust the circular crop area and click insert
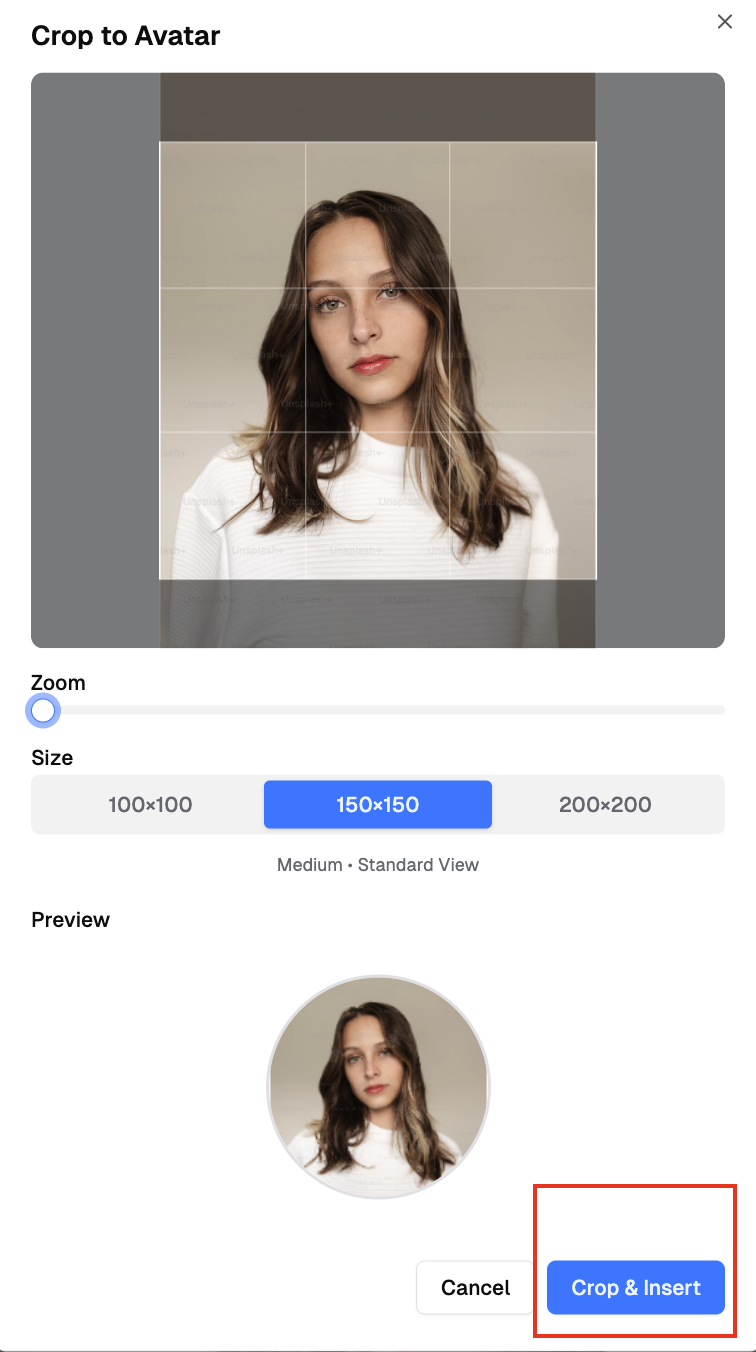
- Result: professional speaker profiles

This tool is available in all description fields (program, days, sessions, items).
Publishing the Program
After creating your program content (days, sessions, items), publish it to make it visible to attendees.
Publish Settings
- Navigate to the Program Settings section at the top of Program Builder
- Toggle "Publish Program" to ON
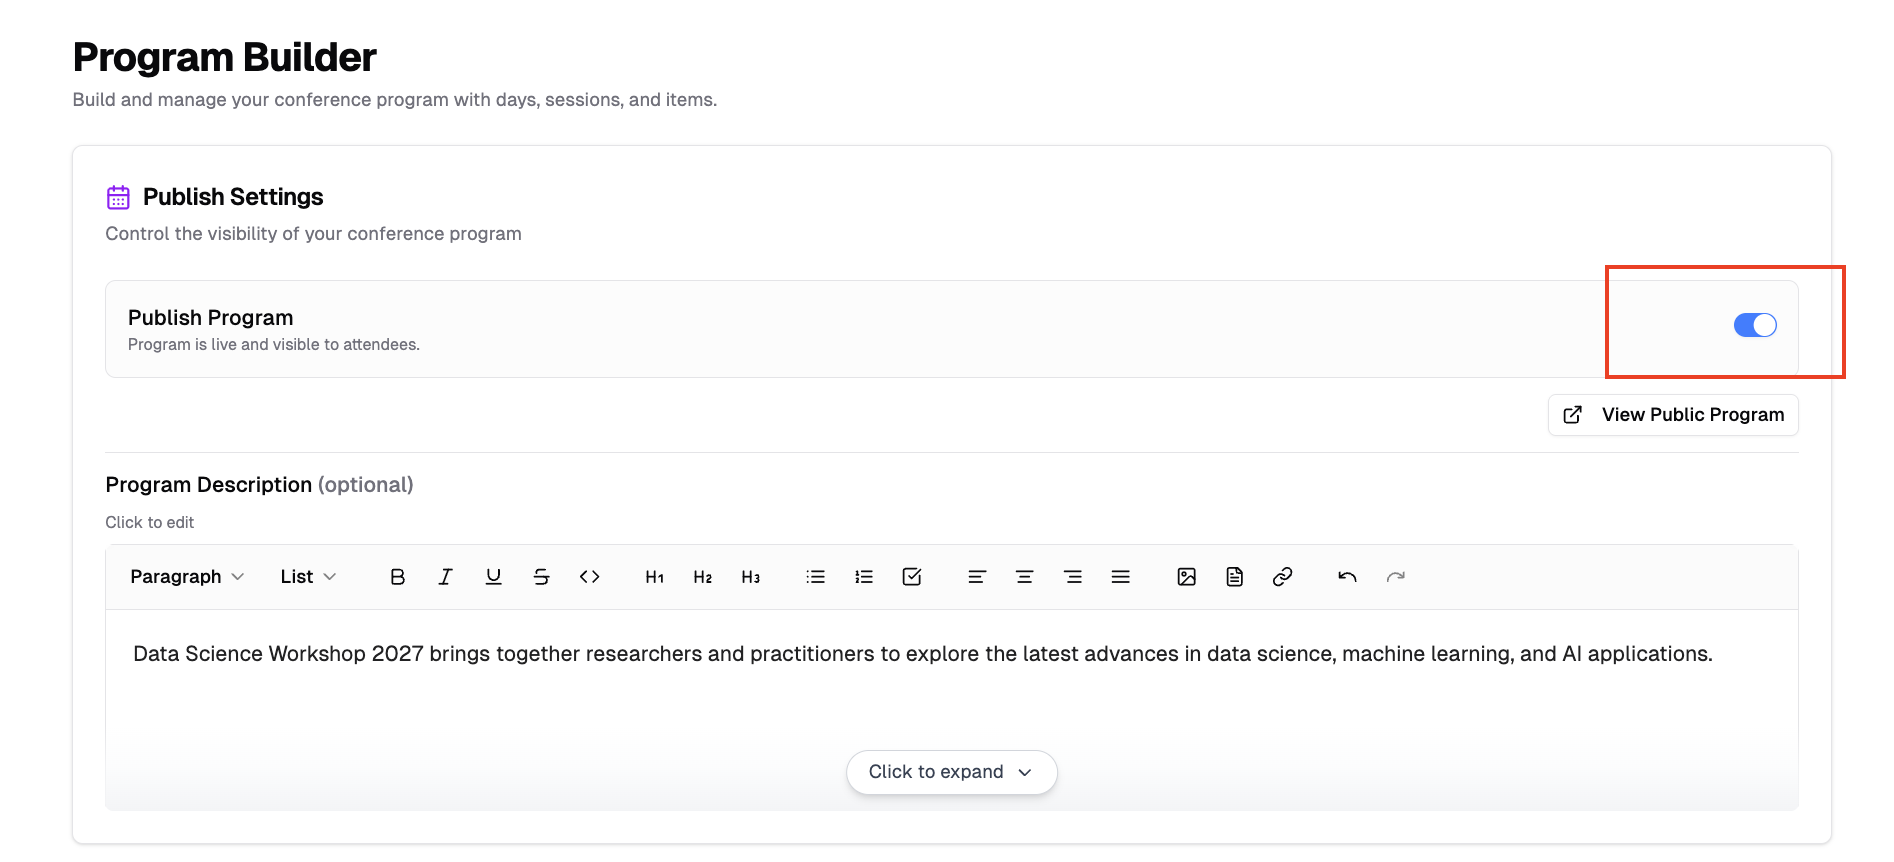
Requirements:
- You must add at least one day before publishing
- Published programs appear on your conference public website
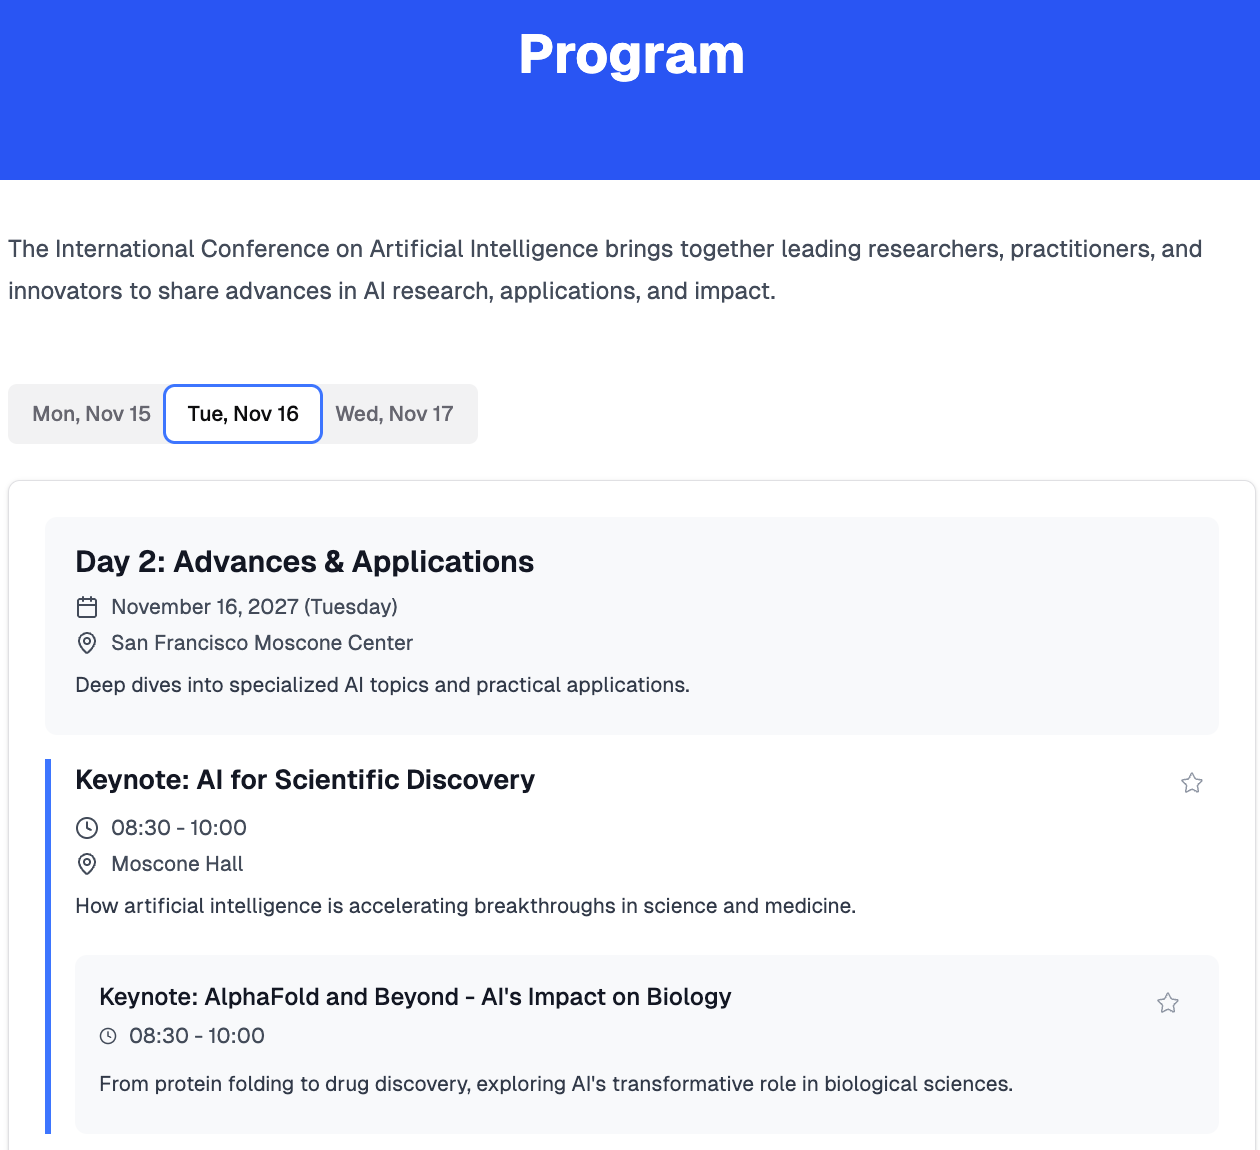
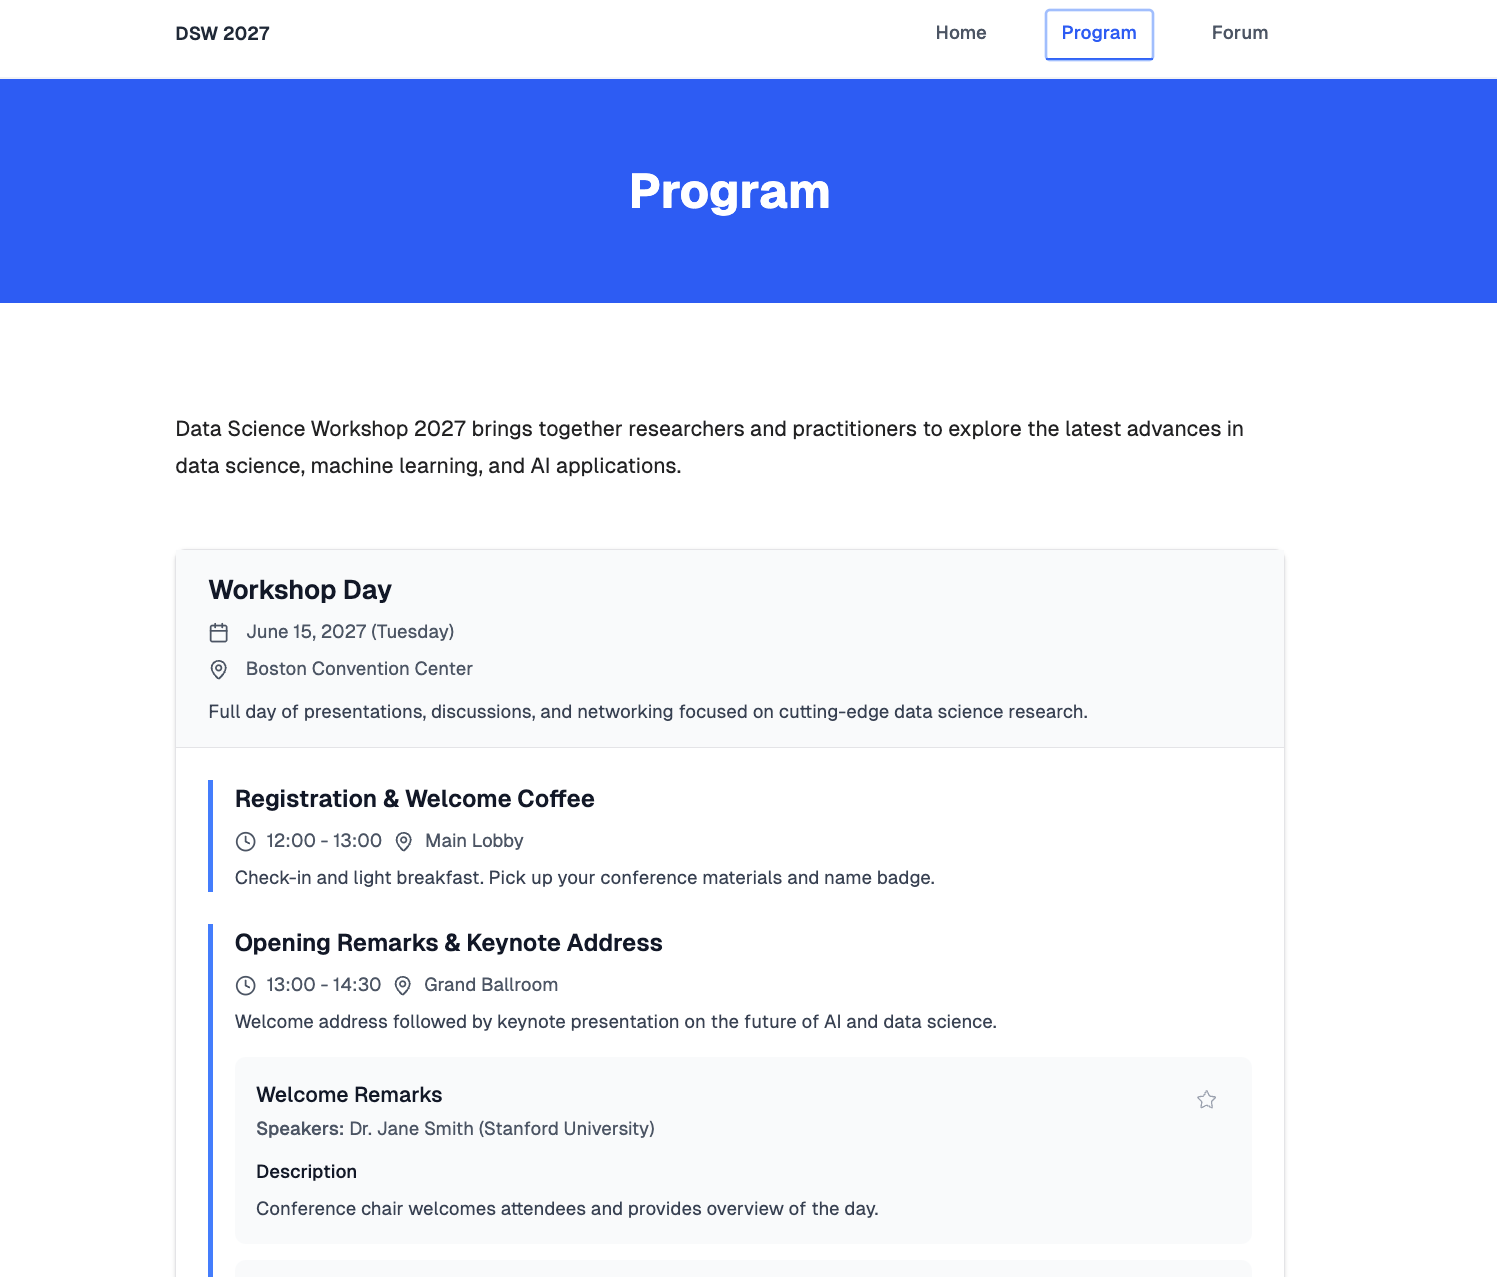
Viewing the Published Program
To preview your published program:
- Click "View Public Program" button
- The program opens in a new tab
Sharing the Program
Once your program is published, you can share it with attendees and promote your conference.
QR Code and Link Sharing
- On the Program Builder page, locate the QR Code section
- Scan the QR code or copy the program link
- Share via conference materials, social media, or email
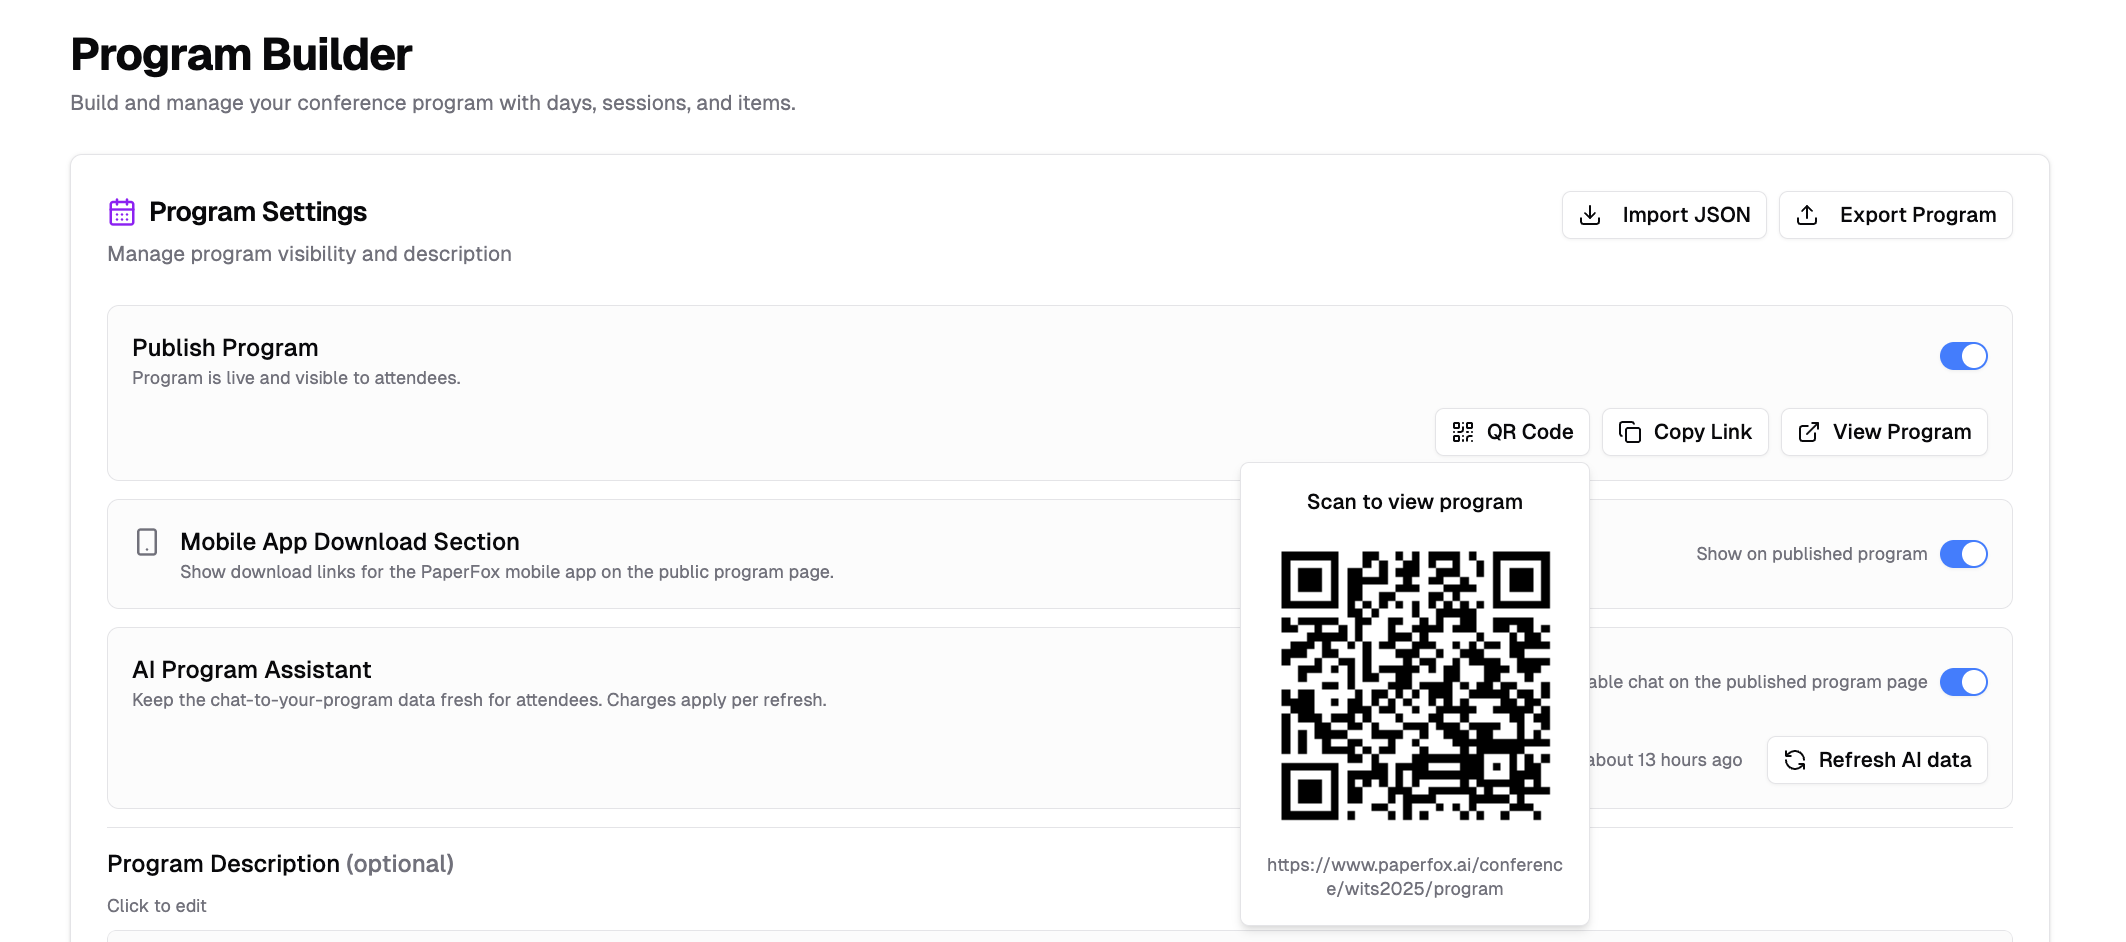
The QR code and link direct attendees to your public program page where they can view the full schedule.
Exporting the Program
Export your conference program in several formats for different use cases:
- In the Program Settings section, click the "Export Program" button
- Select your preferred format:
- Word (Stacked): A Word document with sessions listed top to bottom — best for light editing or a simple printed handout.
- Word (Parallel Columns): A Word document that places concurrent sessions side by side as columns, like a printed program grid. Hover this option and choose Landscape or Portrait.
- Markdown: Formatted plain text for wikis or static sites.
- Text: Plain text with no formatting.
- JSON: Structured data for integration or re-importing later.
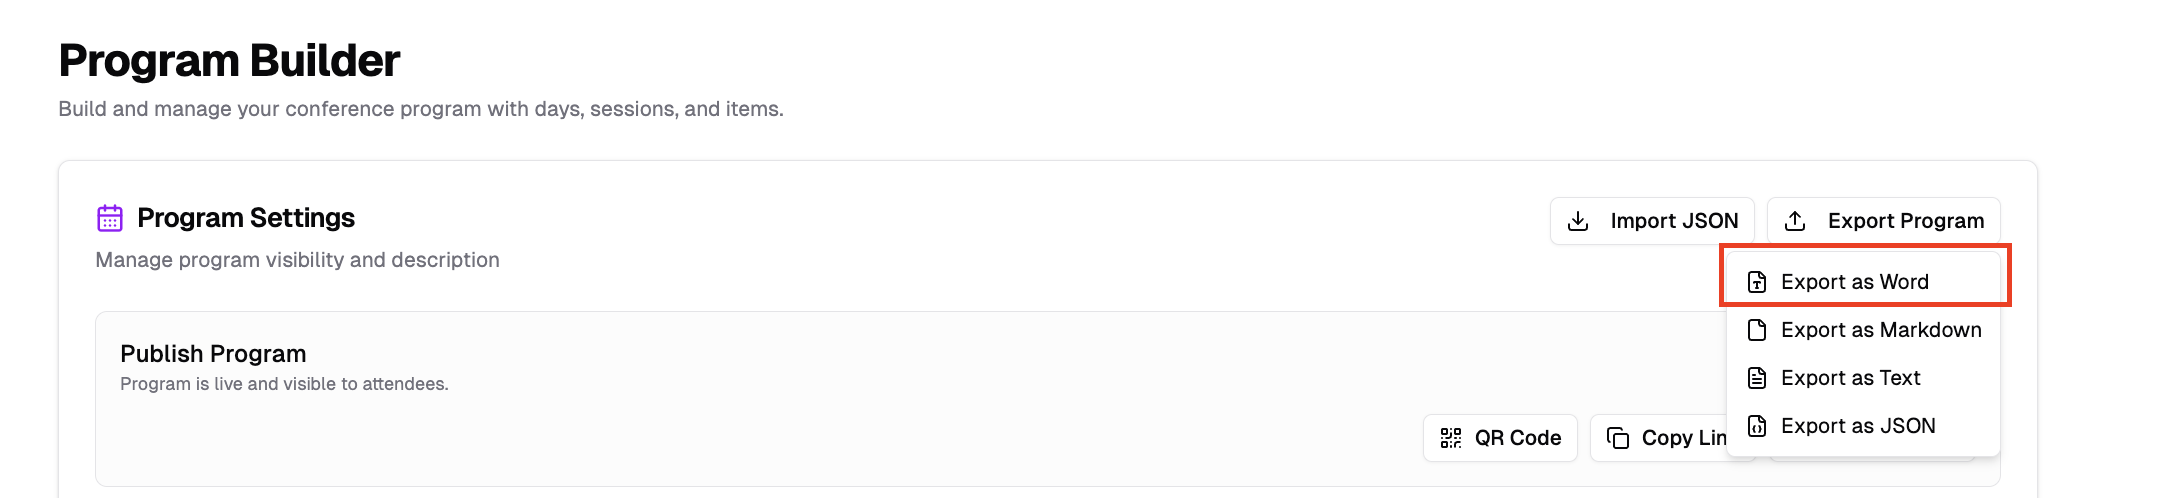
Every format includes all program days, sessions, and items.
Parallel Columns Layout
The Word (Parallel Columns) export is built for conferences with parallel tracks. Sessions that start at the same time are placed side by side as columns under a single time slot — the same way they appear on your public program page.
- Choose Landscape to fit more columns across the page, or Portrait for standard upright pages.
- Columns share the page width evenly: two parallel sessions split the page in half, three into thirds, and so on.
- When a time slot has more parallel sessions than fit comfortably across the page, they wrap onto additional rows.
Each column shows the session title, and for every paper its title and authors with affiliations.