Set Up Conference Registration
Configure registration types with pricing and availability windows, then enable registration for your conference
Configure conference registration to allow registrants to register for your event. Registration requires setting up registration types and configuring the registration form.
Registration Setup Process
1. Create Registration Types
Registration requires at least one enabled registration type.
- Go to Conferences in the sidebar, then click on your conference
- Under Registration Management, click "Registration Types"
- Click "Add Registration Type"
For each registration type, configure:
| Field | Description |
|---|---|
| Name | Display name (e.g., "Early Bird", "Regular", "Student") |
| Price (USD) | Set to 0 for free registration |
| Max Quantity | Leave empty for unlimited capacity |
| Enabled | Toggle on to make it available to registrants |
Availability Window
You can set an availability window to control when each registration type is open for purchase:
- Available From — When registration opens (e.g., start of early bird period)
- Available To — When registration closes (e.g., end of early bird period)
- Timezone — Defaults to Anywhere on Earth (AoE)
Leave both dates empty to make the type always available when enabled.
Time-Based Registration Example
Create multiple types with different windows for tiered pricing:
- Early Bird ($100): Available From Jan 1 → Available To Mar 31
- Regular ($200): Available From Apr 1 → Available To Jul 31
- On-Site ($300): Available From Aug 1 → Available To Sep 15
What Registrants See
- Available types — Selectable with price shown
- Expired types — Shown as "Registration closed" (greyed out)
- Sold-out types — Shown as "Sold out" (greyed out)
- Future types — Hidden until their availability window opens
Locked Fields After Sales
Once a registration type has sales, name and price are locked to protect existing buyers. You can still change:
- Max quantity (increase or decrease capacity)
- Enabled status
- Availability window dates
2. Configure Registration Form
- Under Registration Management, click "Registration Form"
- Customize form fields for registrant information, or use the default form
- Add custom fields specific to your conference (e.g., dietary preferences, T-shirt size, accessibility needs)
- Save and publish the form
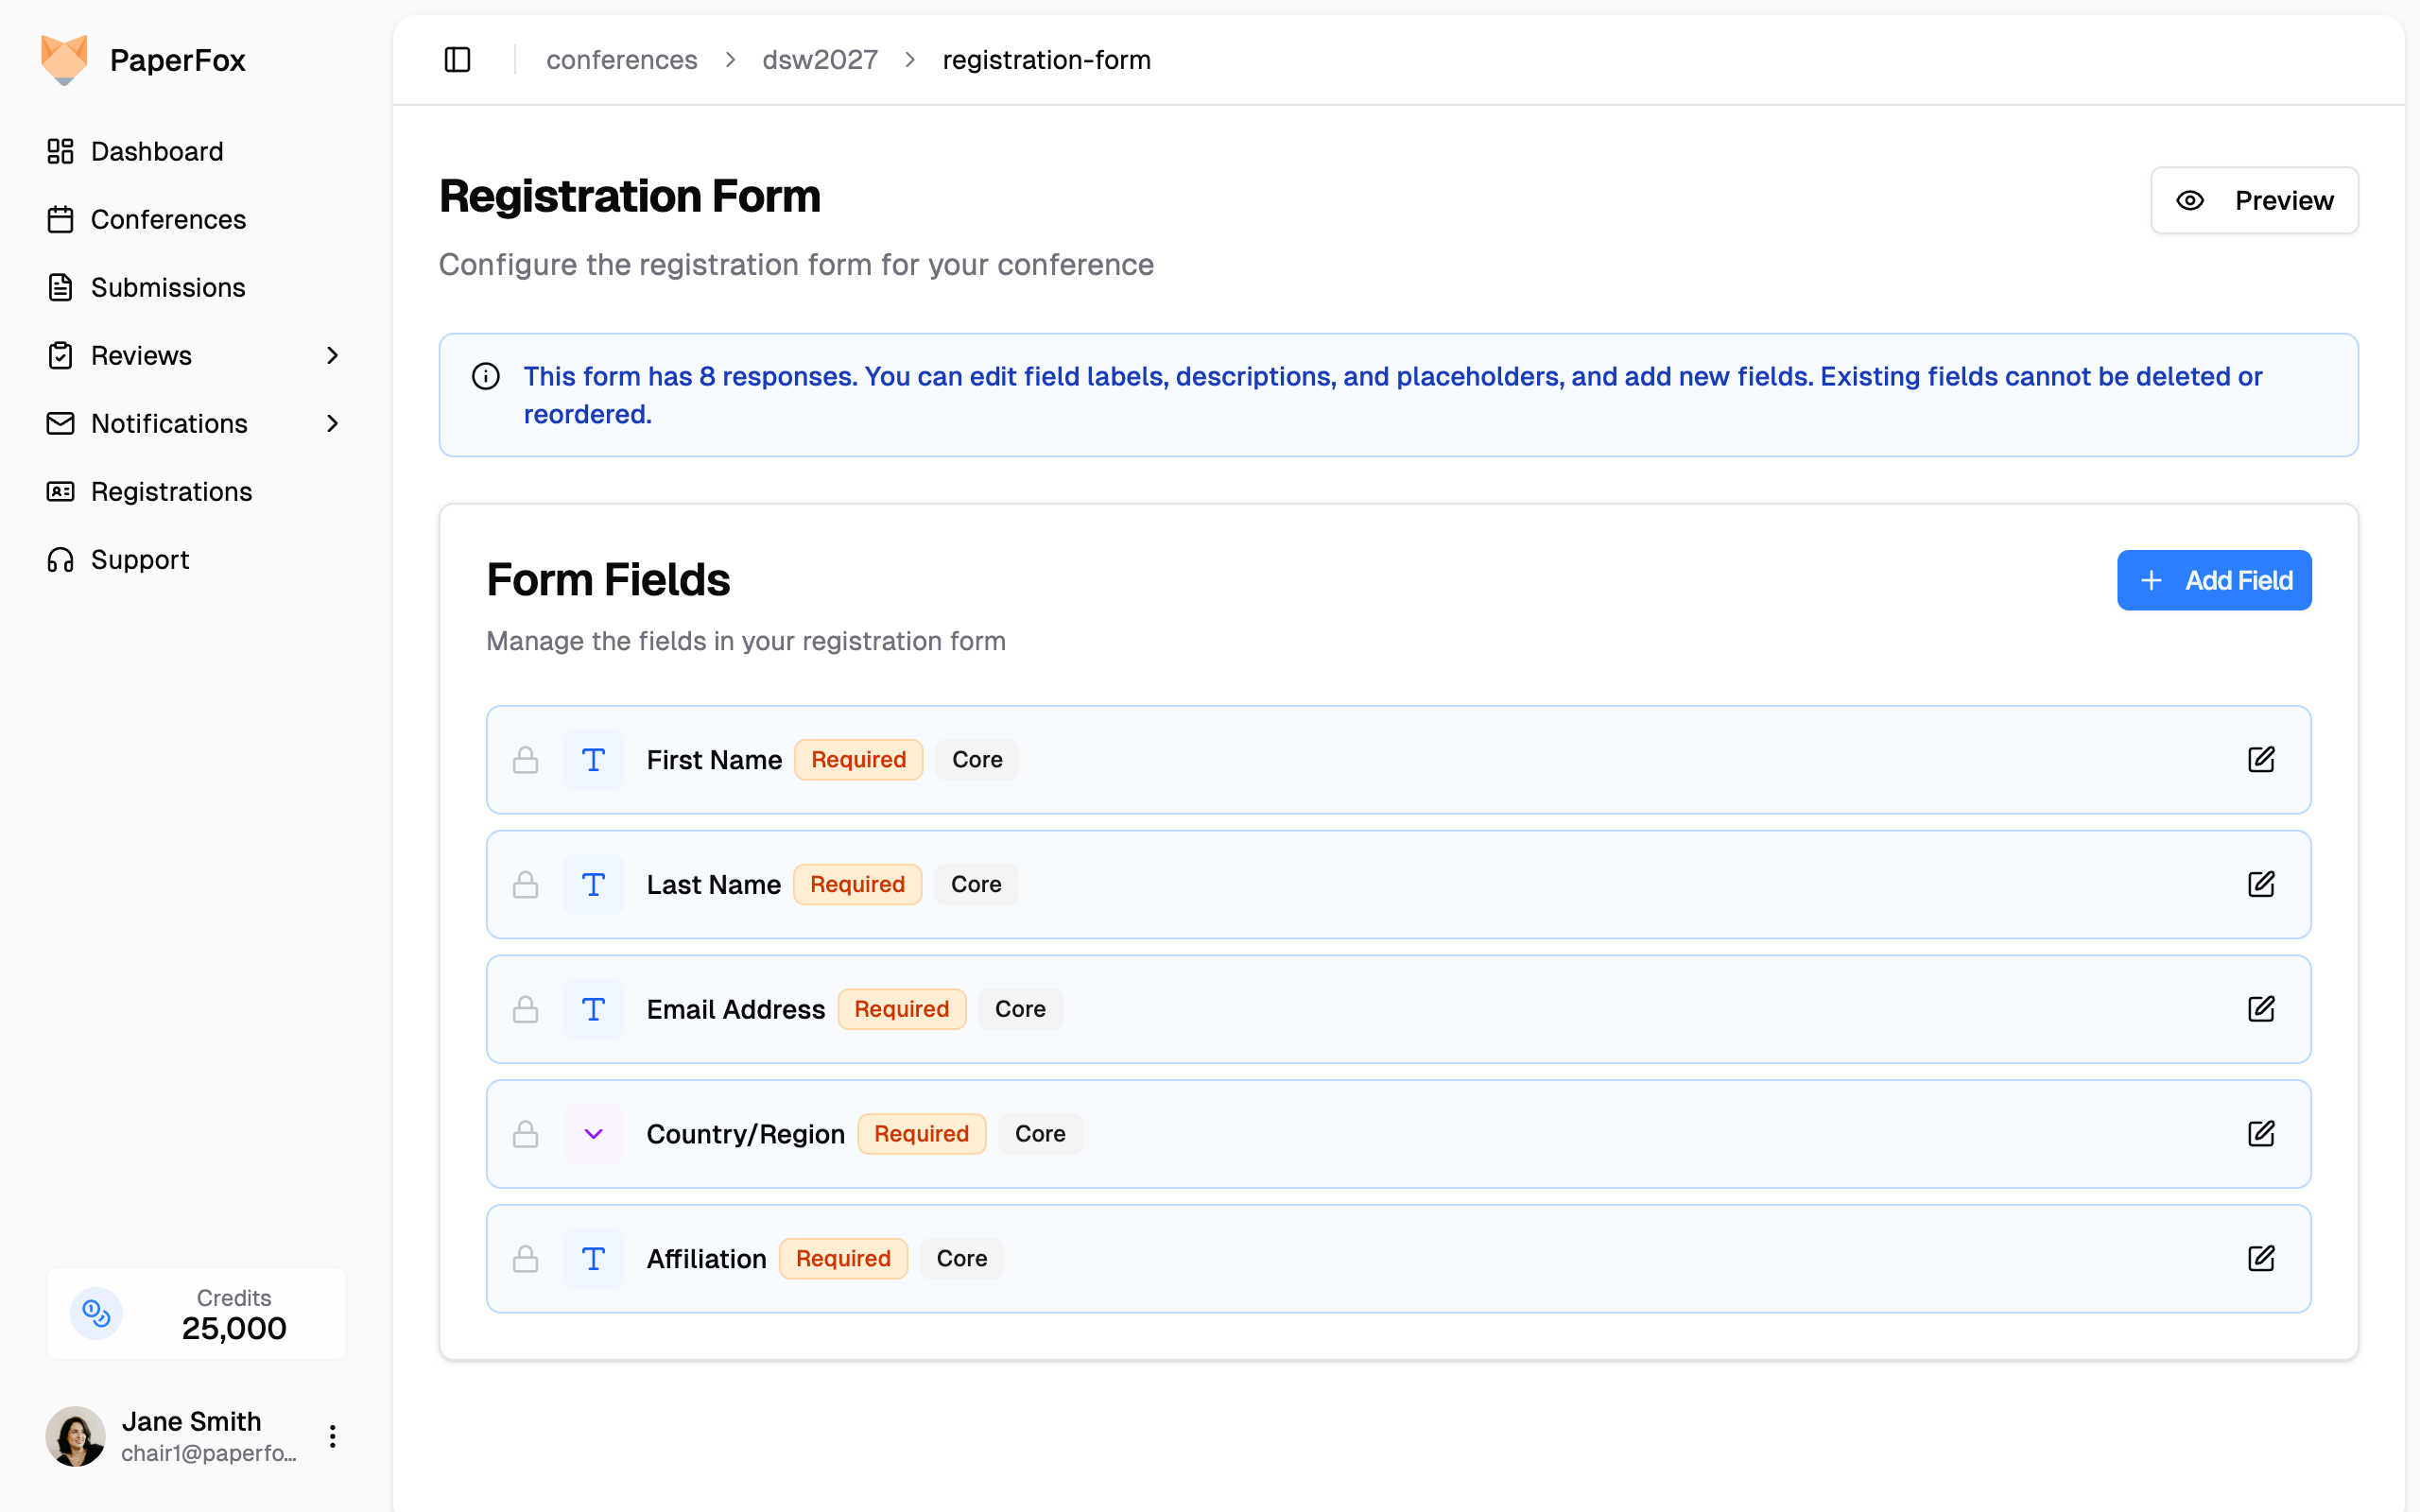
Core Fields
Five fields are marked Core and must remain on every registration form:
- First Name
- Last Name
- Email Address
- Affiliation
- Country/Region
Their labels, descriptions, and placeholders are fully editable, but the fields themselves cannot be removed. The country field's options come from a built-in country list.
Editing Rules
| Action | Before any registration | After registrations exist |
|---|---|---|
| Edit field labels, descriptions, placeholders | ✅ Allowed | ✅ Allowed |
| Add new custom fields | ✅ Allowed | ✅ Allowed |
| Delete a custom field | ✅ Allowed | ✅ Allowed if no responses; otherwise blocked |
| Reorder fields | ✅ Allowed | ❌ Blocked (drag handles replaced by lock icons) |
| Delete a Core field | ❌ Blocked | ❌ Blocked |
| Change a Core field's type (e.g. text → dropdown) | ✅ Allowed | ❌ Blocked |
Why Core fields are protected
First Name, Last Name, Email, Affiliation, and Country are stored as dedicated columns on each registration record. Removing them or changing their type would orphan data already collected from registrants, so PaperFox locks their structural shape — but their visible text stays free for you to reword as needed.
3. Enable Registration
- Return to your conference page
- In Registration Management, toggle "Enable Registration"
The system automatically publishes your registration form when you enable registration.
Stripe Required for Paid Types
If you have paid registration types, you must connect Stripe before enabling registration. See Managing Registration Payments for setup instructions.
Managing Active Registration
Registration Overview
Monitor all registrations from the Registration Overview page under Registration Management → Overview.
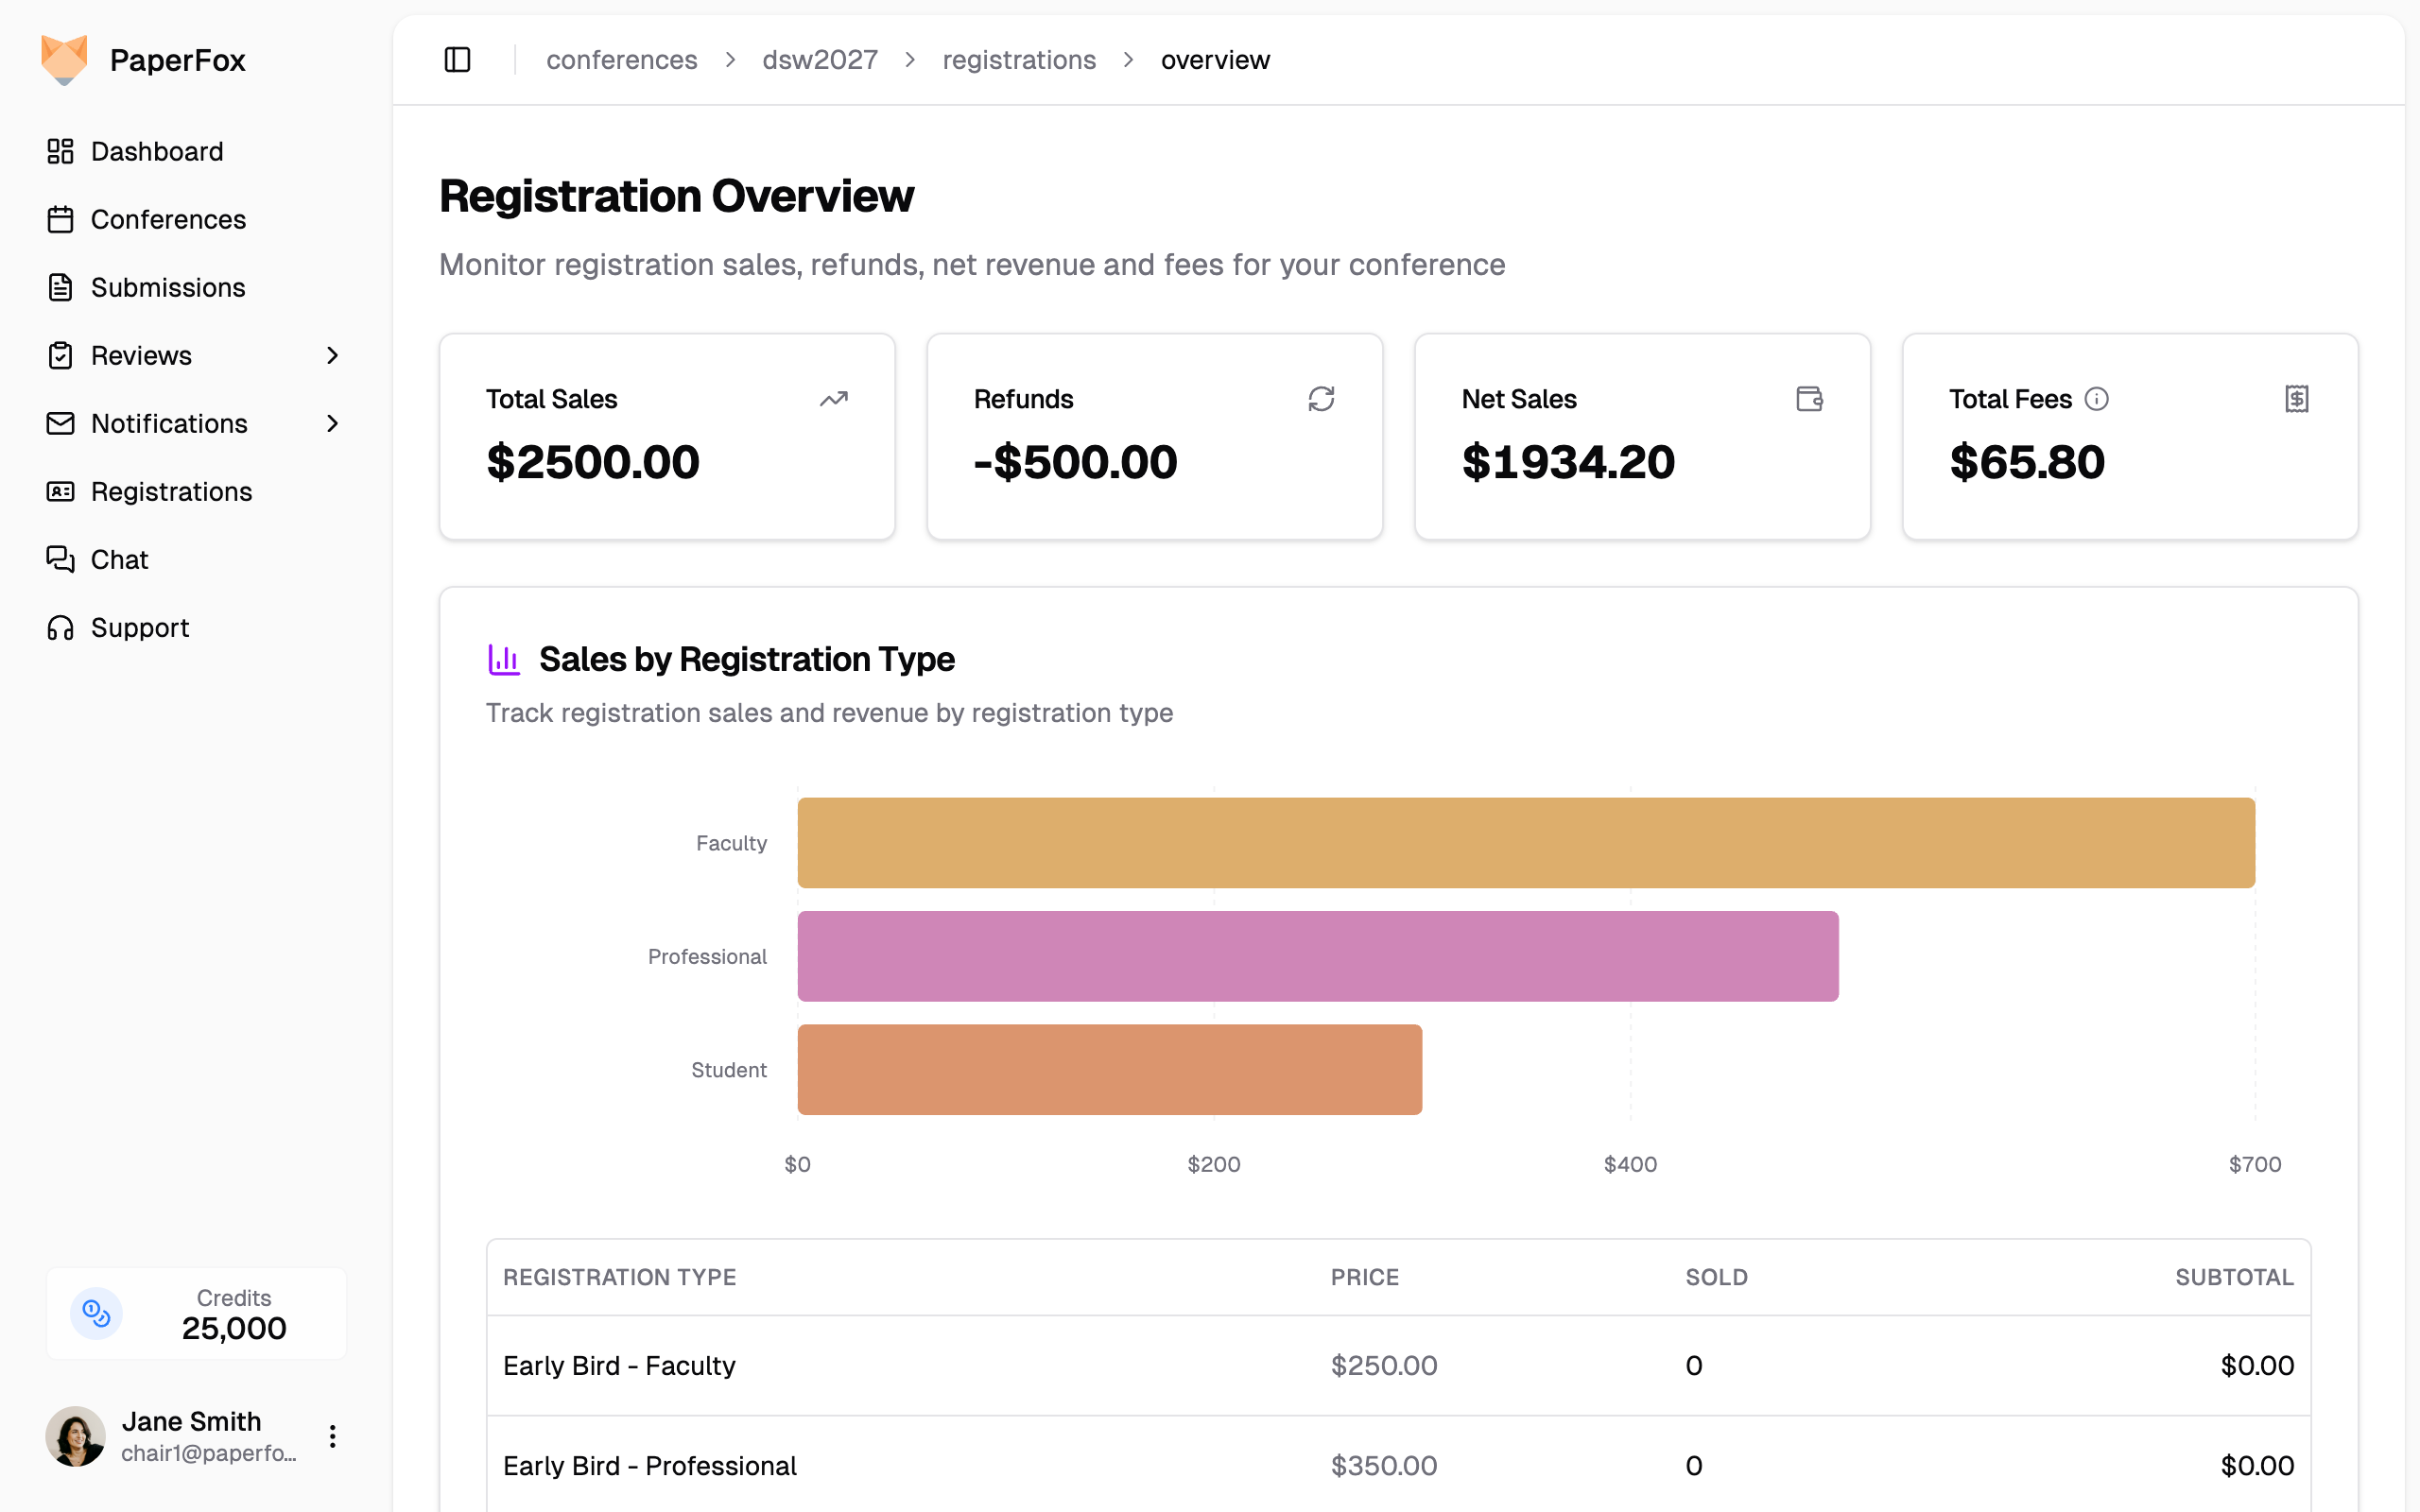
The overview page includes:
- Revenue stats — Total sales, refunds, net sales, and fee breakdown at a glance
- Sales by Registration Type chart — Visual bar chart showing revenue per registration type (only types with sales are charted). Hover over bars to see revenue and quantity sold. When no sales exist yet, a placeholder appears until the first registration is sold.
- Sales table — Detailed breakdown of all registration types with price, quantity sold, and subtotal
- Recent orders — Latest registration purchases with registrant info and payment status
Registration Types Page
From the Registration Types page, you can:
- View all enabled and disabled types with their availability dates and capacity
- Click "View Registration Page" to preview the public registration page
- Add, edit, or delete registration types
- Reorder types by dragging the grip handle on the left of each row
Reordering Registration Types
Registration types are displayed to registrants in the order you set. To change the order:
- Go to Registration Management → Registration Types
- Grab the drag handle (the dotted grip icon on the left side of any row)
- Drag the row up or down to the desired position
- Release — the new order is saved automatically
The order you set here is the order registrants see on the public registration page. Both the Enabled and Disabled tabs support independent reordering.
Refund Policy
Set a flat administrative fee that's deducted from every refund. You set this once here, registrants see the same amount when they request a refund, and you don't re-enter it for each approval.
- Go to Registration Management → Registration Types
- In the Refund Policy card at the top, enter the fee in the USD field (e.g.
30.00) - Click "Save"

Set the policy to 0 for full refunds. Authors see "You'll receive $X" in their refund-request dialog with this amount already deducted, so the policy is transparent before they submit.
The fee is a flat amount between $0 and $10,000 — it's not a percentage. Keep it below your registration prices: a refund can't be approved if the fee meets or exceeds what the registrant paid. If that happens, the approval dialog prompts you to lower the fee on this page first (for example, a $50 fee can't be applied to a $40 ticket's refund).
Changing the policy applies to every refund approved from that point on, including pending requests submitted under the old policy — so avoid raising it after registrants have already submitted their refund requests. See Handling Refunds for the approval workflow.
Refund Management
Handle refund requests through Refund Management:
- Review refund requests from registrants
- Approve or deny requests
- Communicate with requesters
Form Modifications After Registration Opens
Once registrants start registering, the builder shows a banner with the response count and switches into soft-lock mode. You can still:
- Edit any field's label, description, placeholder, and required flag
- Add new custom fields
- Delete custom fields that have no answers yet
What's locked once registrations exist:
- The five Core fields (First Name, Last Name, Email, Affiliation, Country) cannot be removed and their input type cannot change
- Existing fields cannot be reordered (drag handles are replaced with lock icons)
- Custom fields with answers cannot be deleted (delete button is disabled)
See Configure Registration Form above for the full editing rules table.